Showing posts with label Baking. Show all posts

Saturday, January 21, 2012

Long Hiatus...

This blog has been dormant for over a year now, since my last entry was as far back as Oct 2010, but quite on the contrary, life in 2011 had been full of ups and downs, both on the work and personal fronts!

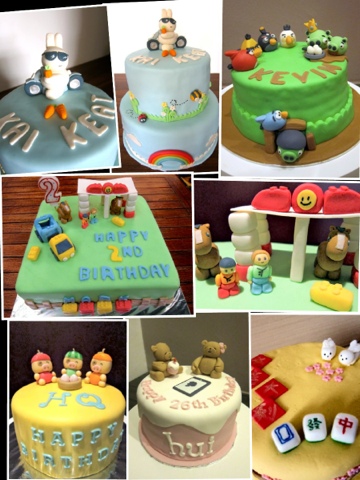
For one, Ah Mak had not been cooking quite as much as she would have liked, but rather, her oven and endurance had been put to the test as baking went on overdrive last year! From cakes, cupcakes and a bit of both! I was amazed how many orders i received just by posting photos of my finished works on facebook.

Thankyou to all my lovely friends and new found friends for their support and the many opportunities to put my creativity to the test!!

For 2012, my resolution is to be much more active in sharing my love for cooking and baking, and also try to set up a proper website so that it is easier to take orders and properly showcase Frostings (that is the name i have in mind for now... Happy to hear any feedback!)

Will definitely blog again soon, since its chinese new year once more and i would love to share some healthy home cooking recipes!

Till then, gong xi fa cai!!!

Saturday, September 25, 2010

I'm the Bakezilla!

It's been a long time since I last blogged - mainly because almost all weekends over the past couple of months had been fully occupied with baking and cake decorating.

Aside from fulfilling orders for a few friends, Cor & I have also recently completed the PME Professional Diploma - Sugar Paste Module @ Bake-it-Yourself, which helped to improve our sugar crafting skills given that I've really been self-taught so far, and saved lots of time and heartache spent to trial and error on my own. The course itself was rather intense, because it takes up a significant amount of time for each class, but we all took away some valuable knowledge, and made a few great friends!

So here are some of my creations during the course:
Fruit/ Picnic Basket Cake
This cake was decorated with Frannie in mind as I brought this to her farewell party that evening. The theme was ER (Emergency Room) so I thought the "Fruit basket" may be apt. She is originally from the Philippines, and hence the smiley mango!

In this class we learnet more about patchwork cutters, embossers as well as how to create a fabric effect. Had some time to spare so decided to play with lustre dusts and butterflies

For our final project we were asked to create a tiered wedding cake. My theme was a little more Art Deco but didn't have enough time to finish up (because I encountered problems on the baking stage which took up way too much time!) 
I'm not totally happy with the outcome but I've definitely learnt lots from this project!

So after taking a week off at the end of the course, it was back to baking for friends again! First up was Cupcakes for Tiff's boys as Teacher's Day gifts:

Vanilla Butter Cupcakes with Chocolate Buttercream


And my most challenging project to date was for little Ian's 3rd Birthday - a 3D Mickey Mouse Clubhouse Cake! It took lots of planning especially around the architectural setup, some physics as well as making sure that from a design angle it actually resembled the MM Clubhouse!

This is what the real toy looks like:
And my finished product (Mickey, Pluto and Goofy figurines were provided by the birthday boy's parents):

Ah Mak's Mickey Mouse Clubhouse Cake

I was so glad that things turned out alright in the end, because there was some major cake drama in the morning where the weight of the head and hand couldn't hold due to the overnight humidity change! I had to redo some parts on the spot under lots of time pressure.

It felt amazing though, to see little Ian playing with the cake thinking that it's the real clubhouse! hehe...

I can feel that with each project, I'm "levelling up" like in RPG games (sorry the geek in me is speaking)! More coming up this month, so watch this space!

Sunday, April 25, 2010

Recipe: Best Ever Soft-Baked Choc Chip Cookies??

I'm still very much a beginner at baking stuff, because it requires some sort of precision and technical understanding. I'd much rather cook day-to-day dishes because it allows me to improvise based on whatever I could get my hands on in the fridge!

Of late, I've been researching on the net on Soft-baked Chocolate Chip cookie recipes - because Kays absolutely LOVES them, but always has a hard time looking for good soft-baked cookies. So far, his choices have been limited to Subway & Pepperidge Farm (sold at supermarkets), and we always wished that Marks & Spencer would stock something like this, but with no such luck. So this weekend I decided to give him a little treat:

 Ah Mak's Soft-baked Chocolate Chip & Macadamia Nut Cookies

After going through various recipes, I'd realised that the common ingredient amongst all of them was Jell-O instant vanilla pudding mix! THAT is the secret to the soft & chewy centre, while the outer crust is nice and crispy.

Another tip when trying out recipes from the net. If you're not experienced or not sure whether you'd like it, reduce the portions stated in the recipes PROPORTIONATELY so that you don't end up with a huge batch of food which you don't like. Since this is the first time ever I've tried out cookies, and I'm always worried that they'd turn out too sweet or too many, I halved the original recipe and and luckily so because it still yielded almost 25-30 cookies!

This recipe is so amazingly simple, and best of all, minimal washing required! The family was happily chowing them down and Kays has requested for white chocolate chips + cranberries next, and Mous suggested sultanas/ raisins~. The dough is standard, so knock yourselves out coming up with new combinations!

Yields 25-30 Cookies (depending on size)
Ingredients:

2 1/4 cups All Purpose/ Plain Flour
1 tsp Baking Soda
1 cup Butter (approx 230g) - softened at room temperature and cubed
3/4 cup Brown Sugar
1/4 cup Caster Sugar
1 pack (1.5oz) Instant Vanilla Pudding Mix
2 Eggs
1 tsp Vanilla Extract
2 cups Semi-Sweet Chocolate Chips
1 cup chopped Macadamia nuts (I was too lazy to chop them up and decided they'd have giant chunks instead!)

All ingredients are easily accessible 
(instant vanilla pudding mix can be found at Cold Storage/ Marketplace outlets)

Directions:
1. Preheat Oven to 175 degrees Celsius.
2. Sift together Flour & Baking Soda, set aside.
3. In a mixer with paddle attachment (or if you want to tone up those arms - do it by hand!), cream Butter, Brown & Caster Sugar until smooth & shiny. Add Instant Pudding Mix and blend till well-incorporated.

My Red Kenwood Patissier Mixer - BFF since I discovered baking!

4. Stir in Eggs & Vanilla Essence (at this point the mixture looks a bit gross, like pulpy oatmeal coated in clear jello... but it's normal!)
5. Gradually add in flour and mix till it becomes a nice smooth pasty dough.
6. Remove from mixer and add in Chocolate Chips & Macadamia nuts.
7. Wrap bowl with cling wrap and place in fridge to chill dough for 20 mins.
8. Line baking tray with ungreased baking sheet and spoon dough mixture onto tray. As a rule of thumb each optimal size for me was about half an ice-cream scoop. Allow around 2 inches of space between cookies so that they have room to "grow" in the oven... I was too greedy - scooped too much placed them too close together!! (ref: pics below)
9. Place in oven and bake for 10-12 minutes. A toothpick inserted in the centre should come out clean. Let cool on rack and store chilled in an air-tight container.


See how crowded and fat my cookies became! :(

But thankfully they still turned out alright! 
I had to gently cut them apart when they're done.

I'm happy to report that this recipe is perfect! Not too sweet, just crumbly & crispy enough outside and cake-like soft centre on the inside!

Eat Up!

Sunday, April 18, 2010

Photos from Jevan's Birthday Party

Just wanted to share the photos that Pin took for little Jevan's party in school! Happy to hear that the kids loved the cupcakes! I was worried that the kids maybe too young to know who Iron Man was, but much to my surprise Iron Man was most popular amongst the girls on that day! (I wonder why...)

The chocolate cupcakes with cream cheese frosting were a hit and Pin did a great job arranging them on the DIY cupcake stand that I provided! It was lots of effort producing these cupcakes, but seeing these pictures (Jevan and baby sister Kylie are such sweeties!) makes it all worth it!

Jevan looking shy at his birthday celebration

Pin setting up earlier on

Big brother Jevan & baby sis Kylie (check out that fashionable beanie!)

Jevan with the girls~

...and the boys

Time to pick their cupcakes!

Another one going for the Iron Man

I'm researching new cupcake recipes and also design ideas. Will post them as I go along!

Sunday, April 4, 2010

Superhero Cupcakes for Little Jevan's Birthday Party

I have not been very good at posting recipes lately, because of work and also this latest project which pretty much kept me busy all weekend. After the cupcake decoration party @ Hazen's a couple of weeks ago, Pin has requested for 48 superhero-themed cupcakes for Little Jevan's birthday party in school. Baking the cupcakes itself was not a problem since I've done it several times, but what's rather daunting was the cupcake toppers, given that I've not really had much experience modelling with rolled fondant and I had very limited tools to help me. Nonetheless, I told the packets of white fondant sitting in my fridge: "Bring it ON!!"

So I went on a rampage on the net, researching everything I possibly could from tinting, moulding and storing fondant, to which types of icing and tools to use for which purpose. I also got myself some basic tools that really made everything lots more efficient and much easier to do! I had the most fun coming up with the design for spiderman & iron man, while the superman logo was the most challenging one as I had to hand paint every one and they had to look the same without the icing colour mixing with the yellow base!

To challenge myself further I also attempted to produce a DIY 3-tiered cupcake stand, which I must say, whilst it's not perfect (I ran out of ribbon, silly me miscalculated...so I had to improvise), did the job pretty well!

Sorry I only managed to take photos of the finished product, and not the process because I was too busy trying to figure out what to do! I will be sharing my research findings shortly in another post, so that beginners (like myself) who wish to give rolled fondant a shot needn't feel too intimidated!

Chocolate cupcakes with Cream Cheese Frosting

...complete with a DIY cupcake stand!

close up of superman, spiderman, iron man cupcakes

into the boxes and all ready to go!

Sunday, March 14, 2010

Cupcake Decorating Birthday Party for little Zelia

It's little Zelia's 3rd birthday and I'd offered to Hazen a batch of cupcakes from me as a birthday gift. After some brainstorming we'd decided to turn it into something fun for the kids to do instead - where they got to decorate their own tiny cupcakes!

After I went to the stores to get my supplies this morning, I got cracking and baked 24 chocolate cupcakes + prepared 2 sets of cream cheese frosting in pink and blue (for the boys). Given that the age of these kids ranged from 1-6, I had to keep things relatively simple and basically just let them have some hands-on fun. I was initially pretty stressed out that I wouldn't be able to manage with 6 tiny tots, but with the mummies' assisting, it all went pretty well!

It was fun to have these active kids stop and listen attentively while I did the demo of how to pipe a frosting swirl, flat frost, and just sprinkle! They each decorated 3 cupcakes, one for themselves and their parents. They held on to their finished works and took lots of pride when they tasted them. I'm happy that everyone loved the cupcakes and little SuperNat even came over to thank me on his own initiative! Aw... Little Jevan now wants to share these cupcakes with his classmates for his birthday party, but since there's limited time to decorate during school, I'd deliver finished cupcakes instead!

Works of art by the mummy + kiddy master chefs

Little Phoelia & Birthday Girl Zelia

The kids: Super-Nathaniel, Jevan, Phoelia, Zelia, Wei Wei, XuanXuan & Abigail